Tips and Tricks Latest Post
Tips and Tricks Latest Post |
| Accept Donations via PayPal from Your WordPress Site Easily Posted: 31 Aug 2021 09:16 PM PDT Do you run a charitable website? Or do you offer content free to the public? Perhaps it is time that you add a donation button to start monetizing your website. In this tutorial, we will walk you through the process of adding a PayPal donation button to your WordPress website, and even those without developer knowledge will succeed in doing so! We will use the free WP Express Checkout Plugin to create our donation-style product. This plugin uses the PayPal payment gateway to accept payments meaning your customers will check out in not only a simple but also a secure popup window.  If you want to accept donations via Stripe, then check out our accept Stripe donations tutorial. Why Should I Add a Donation Button to my Website?If you are a freelance artist in the music industry or you produce digital graphics for free, you may like to have a donation button so that your followers can help fund your future projects. Perhaps you are the leader of a charitable organization doing good in a community and you need extra funds to help purchase food, bedding, or furniture. Or maybe you have a vision and are looking for like-minded people to donate to help you lift it off the ground. There are many reasons people seek out donations from others, and in this tutorial, we will show how simple it is to add a donation button to your website where the funds are transacted through the well-trusted PayPal payment gateway. Adding a donation button allows you to start monetizing your website if you are yet to do so already. Adding a PayPal Donation Button to Your WordPress WebsiteBefore we walk you through the steps of how to add your donation button to your website, you will need a PayPal account. This will allow you to accept the donations your customers gift to you or your company. If you are yet to become a PayPal account holder, the good news is it is free and simple to sign up for. You will need to jump onto PayPal.com and Sign Up prior to continuing. Video Tutorial: Adding a PayPal Donation Button To Your WebsiteWritten Tutorial: Adding a PayPal Donation Button To Your WebsiteStep 1) Install and Activate the WP Express Checkout PluginIn this tutorial, we will be using the free WP Express Checkout Plugin by Tips and Tricks HQ. This plugin gives us the functionality on our WordPress website to create products and then add our product shortcodes anywhere on our WordPress website. The WP Express Checkout Plugin runs payments through the PayPal payment gateway and records transactions in one neat orders menu that administrators can view from their WordPress dashboard. Before we continue, you will need to install and activate the WP Express Checkout Plugin on your WordPress website. If you are unsure how to do so follow the steps below:
 Step 2) Complete the Basic Set Up of the WP Express Checkout PluginBefore we create our first donation-style product, you will need to complete the required setup of the plugin. This should take you no more than 15 minutes and we have a step by step documentation to help you along the way.
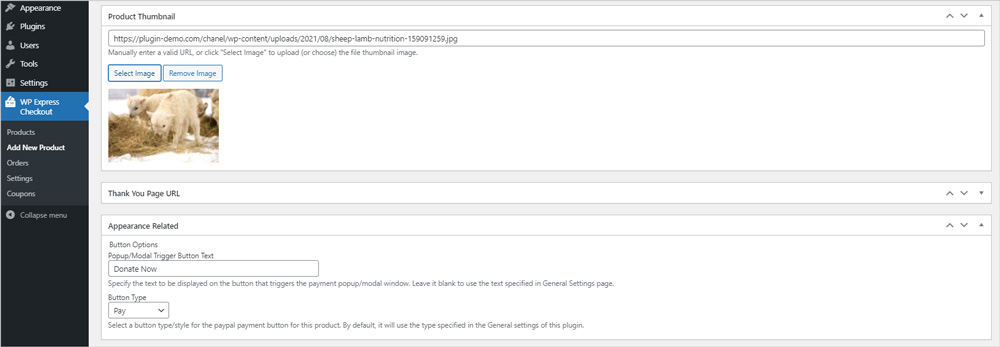
Step 3) Create Your Donation Style ProductWhen we say ‘Product’ that is only the format that we will use to be able to add a button to our WordPress website that allows us to collect donations from our customers. While we will be using the product template, you can simply use this to add details about the donations, rather than actually adding a product that the customer would receive. Every donation is different. Some donations allow the customer to receive a physical or digital product/service in return for their donations, while other donations are simply out of goodwill where nothing other than gratification is received in return. Depending on what kind of donation you are setting up will determine how you complete this step. 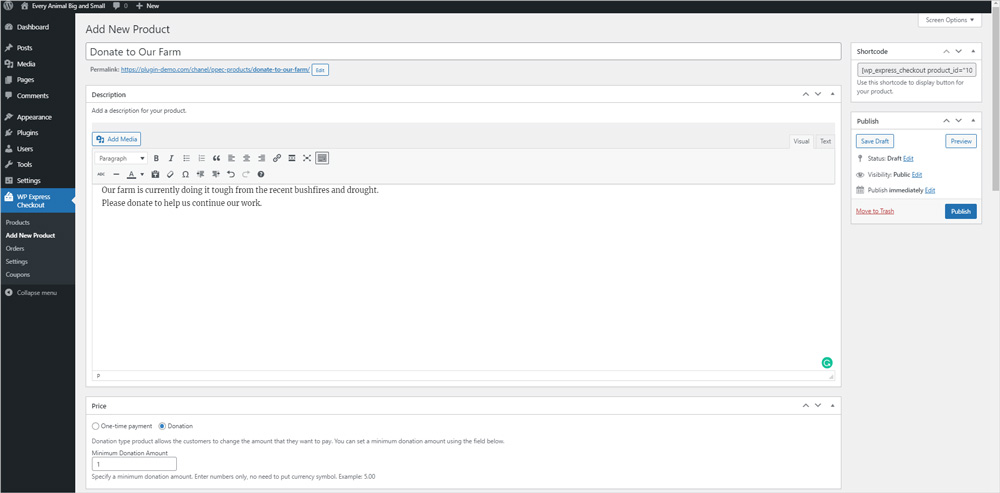
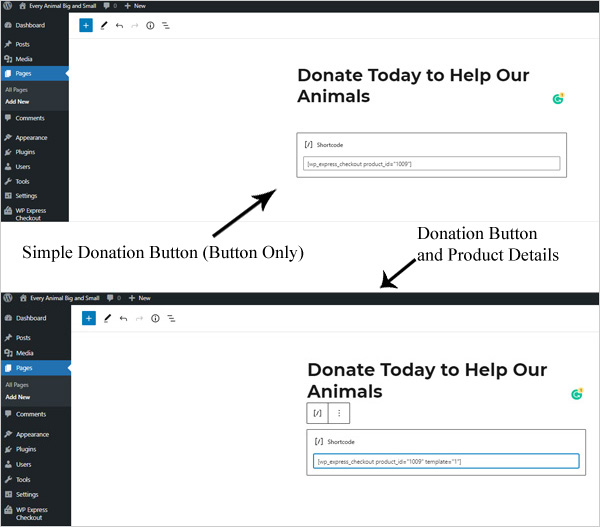
 Step 4) Add Your Donation Button to Your WordPress WebsiteEach product you create using the WP Express Checkout Plugin has a shortcode that can be added anywhere to your WordPress website to display a payment button for that product. You can add the simple payment button of your product, or you can use a template option to include an aesthetically pleasing product box that includes the product thumbnail and description. Using the simple button works well when you wish to list multiple buttons on one page, whereas using a template is a suitable choice when you are advertising one or two products (donations) per page.
 How Can a Customer Checkout Easily with a PayPal Donation Button?The WP Express Checkout handles payments through a popup PayPal window. This ensures that the customer never has the need to leave your website during the transaction process. Once you have completed our four simple steps above to create and add a donation button to your WordPress website your customers should now be able to simply click on your donation button, make a payment that will land in your PayPal account which you can put towards the cause that you are collecting donations for. Step 1) The Customer Lands on Your Website and Notices That You are Collecting Donations 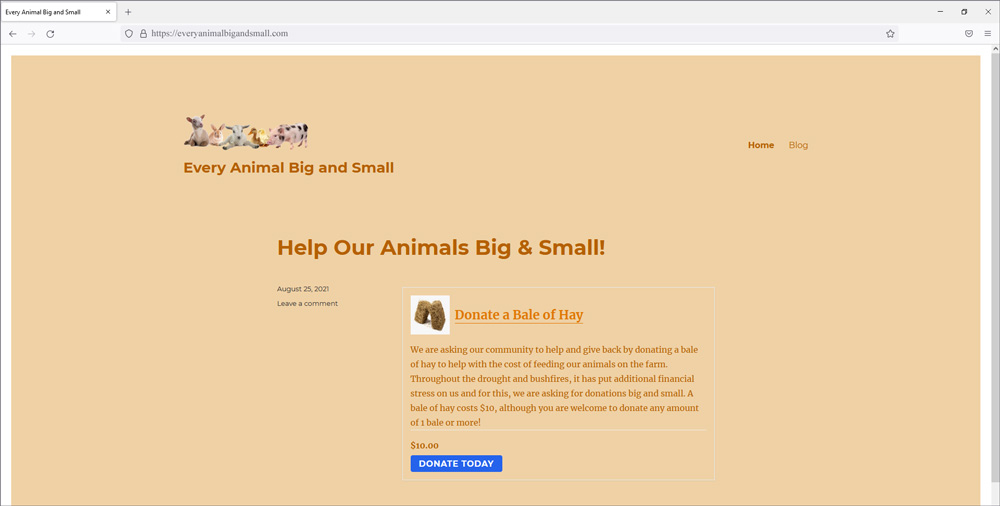 Step 2) The Customer Donates to Your Cause The customer reads the description about your cause and believes it is worthy of their donation. They click on the payment button (Donate Today) and the PayPal Popup window appears. The minimum amount in this example is $10.00 USD. The customer can override this with any amount higher than the minimum if they wish. This customer decides to donate the minimum amount stated and so they click the ‘Pay with PayPal‘ button to continue. 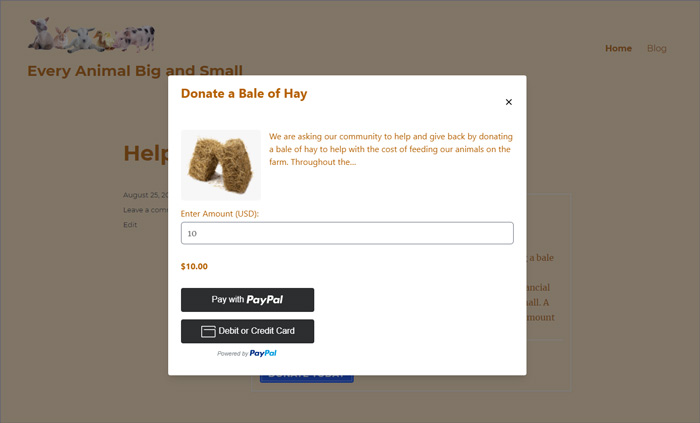 Step 3) The Customer Checks Out With PayPal The customer chooses to use their PayPal balance to make the $10.00 USD donation to your cause. They click the ‘Pay‘ button to complete the transaction. 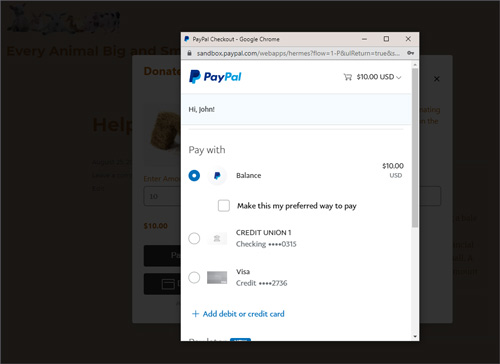 Step 4) The Transaction is Successful. The Customer is Directed to Your Thank You Page. The customer sees the thank you page and feels good about donating to the cause on your website. The money will soon reach your PayPal merchant account (if it hasn’t already!). 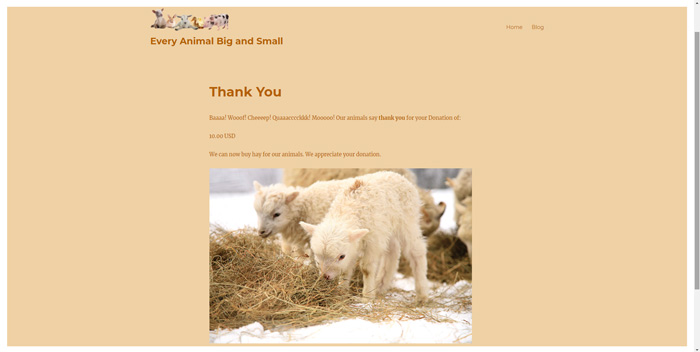 How Can I View Donations on My WordPress Website?Once a customer has completed a successful transaction on your website of a donation-style product you have created, the money will be sent to your PayPal account (to the account that you entered the PayPal credentials for in the settings menu). You can also view the transactions that have been processed through the WP Express Checkout Plugin by clicking on ‘WP Express Checkout‘ and then on ‘Orders‘. You will see the donation transaction details there. If the customer will receive a gift for making a donation, you can obtain their shipping details by clicking on their transaction as long as you have set up your product as a physical product (marked this checkbox on the product creation page).  Adding Multiple Donation Buttons to a PageIf you have multiple donation options on your website, you can simply create a different product for each option. Each product has its own unique shortcode ID which then allows you to add multiple product shortcodes to a single page. In the following example, three different shortcodes have been added to a page where each product has a different minimum donation amount of $10.00 USD, $20.00 USD, and $30.00 USD. This makes sure there is a donation amount suitable for a range of different customer’s budgets. 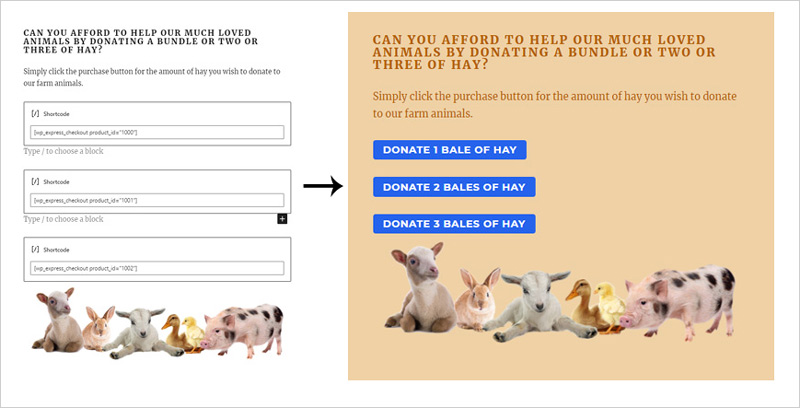 The post Accept Donations via PayPal from Your WordPress Site Easily appeared first on Tips and Tricks HQ. |
| You are subscribed to email updates from Tips and Tricks HQ. To stop receiving these emails, you may unsubscribe now. | Email delivery powered by Google |
| Google, 1600 Amphitheatre Parkway, Mountain View, CA 94043, United States | |


No comments: